Demo Press Valentine's Day 2016

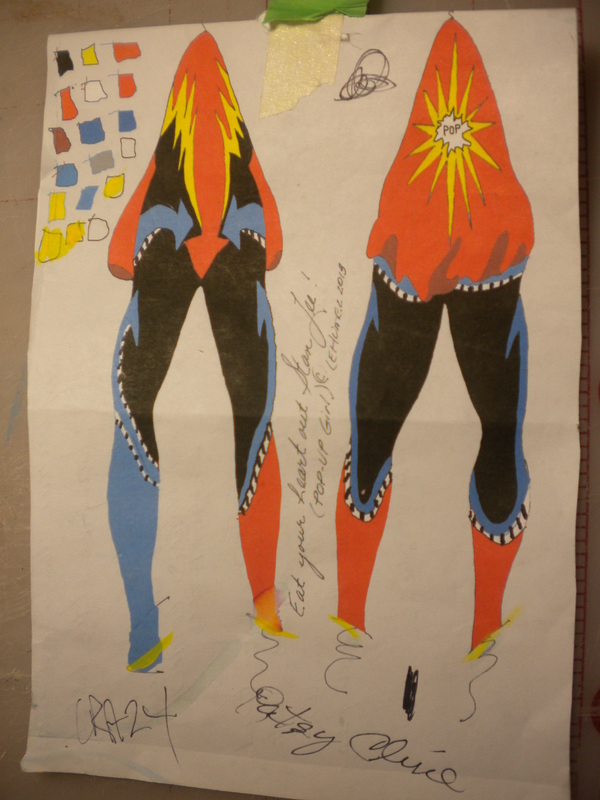
Pop-Up Girl ©
Eat Your Heart Out, Stan Lee
Here she is! A super heroine in her own right! Read on for the details.
|
Backstory... March, 2013
Out of sleepy eyes that myopic March morning, I squinted and tried to focus on a swaddled-in-plastic sculpture in the next room. It appeared to me as if whatever it was, was wearing a cape. How very surreal it seemed. So it began with that vision of a cape and these sketches. When the idea gelled, I was listlessly sorting through comic archives wondering about
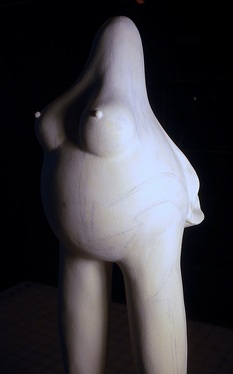
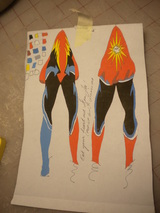
Wonder Woman's costume. I thought about Stan Lee, a super hero himself, who created about 400 comic book characters in his career. A raft of annoying pop-ups filled my search window. And that did it! Why not? (I tapped myself on the shoulder to get my attention.) Why not— create a super geeky heroine whose everyday job is to write pop-up killing software, BUT whose secret super power is to put the truth back into broadcasting by recycling those dead pop-ups into the mouths of some astonished, disingenuous anchorperson? Instead of half-truths coming out of their mouths, every time they slanted the truth, out would pop a window bearing some ridiculous inanity! Perfect justice. The 8 drawings above represent my experiments with color. The Body.... No surprises. It's my preferred clay medium paperclay, with stainless steel rods inserted through each leg and into the pear shaped torso. These threaded rods extend beyond the feet and actually slide into the wooden base, which makes this pear figures extremely stable. (Btw. this armless, faceless pear with legs idea is something I've used repeatedly. It's satirical commentary on that particular patriarchal society which adored the pear-shaped figure, yet insisted women kept hands-off in the electoral process.)
After the figure was roughed out over the course of about a week, I did a lot of sanding to insure that the surface was mirror-smooth. At this stage, I drilled holes in the base. The rods which protruded from the figure's feet were fitted into the holes but not permanently secured. That made it much, much easier to paint. 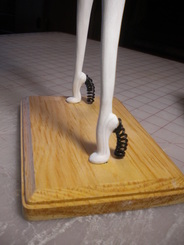
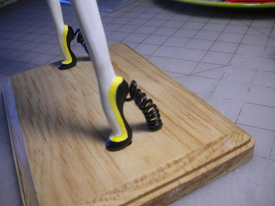
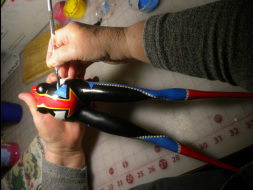
As you can see from the above close-up, the black springs (soft, plastic covered copper wire coiled 'round the stem of a paintbrush) have become the heels of our heroine's shoes. A very small hole was drilled into the bottom of each heel and the tip of the wire was secured with super glue.
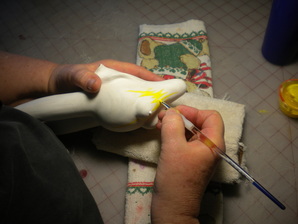
I've very lightly penciled in the design. After that, the surface was sealed with clear varnish, a practice which keeps the pencil from smearing and makes the surface more receptive to paint.
With the design layout at my fingertips, I began by giving the entire figure a thin, transparent wash of white gesso, followed by several coats of the lightest color — in this case yellow — in all the spots where it was indicated.

From there I moved on with red, one of the two medium intensity colors. I worked freehand on the curvy bits, but employed green painter's masking tape to get sharp edges and straight lines.
I've also experimented with automotive pin striping tape; the result was knife sharp edges, but it adhered so well that it lifted bits of the paint below it. Not good. Maybe if I had used it before I gessoed? The jury is still out. No matter how good the masking job, it seems there are always spots to touch up. I'm careful to put on magnifying glasses and scrutinize every surface so that I don't miss a thing. 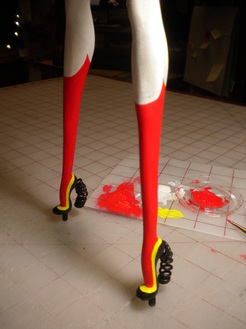
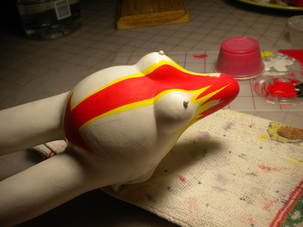
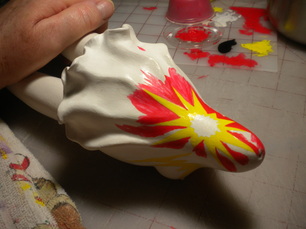
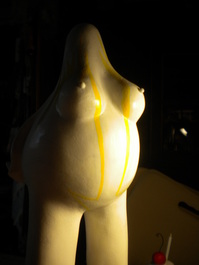
Red and yellow are done. Now on to the darker colors. Blue and black are painted in carefully. Left: The "P" was inked in on the cape, I've added the pear stem above it. Center: Began painting blue and stood back to see how it looked. Right: Finishing the blue arrows.
|

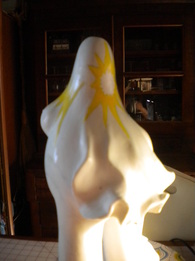
The original sketch is on the left below. In the drawing on the right, you'll notice that the white lines I originally planned have become black and white. I thought that the white area needed just a little more punch, and the addition pleased me.

|
|
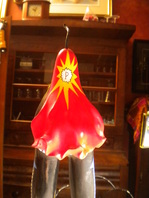
Painting is completed.
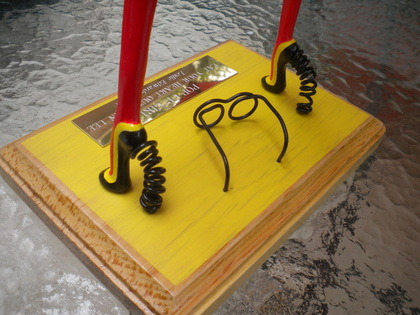
Finishing the base: It's varnished, sanded and varnished three times. Another last minute change: I thought repeating the yellow on the wooden base made sense, so it was masked and given several coats of the same yellow I used on the figure thinned with varnish for a nice transparent finish. After the base was dry, I slipped the stainless steel rods which protrude out of the feet into the holes in the base and permanently glued them in.
Details: A pair of wire glasses have been casually dropped and secured between the figure's feet because everyone knows that some super-heroes wear geeky black horn-rims while in their secret identity. The engraved brass plate with the work's title and my name came from the local trophy shop. Nice touch, don't you think?